
Commissioning fused glass wall art
- Roxanne Denny
- Jan 9, 2019
- 5 min read

Updated: Jan 10, 2019
Hi, I am Roxanne Denny the designer/maker behind RD Glass and thank you for taking the time to read my blog. For my first post I thought that I would run through a recent commission, to give you an insight into how my commissioning process usually goes.
The clients for this piece of wall art had previously commissioned me to produce a piece for their bathroom wall, but now wanted a piece for their en-suite shower room as well.

Firstly they emailed to give me the initial brief for the project, which was a piece of glass wall art measuring approximately 20cm x 30cm using mostly yellows and orange and perhaps with overlapping oblongs. I knew from our previous discussions that a bold abstract design, using geometric shapes is what they would want. As the brief was quite similar to the outcome from their previous piece, my initial three ideas were kept to the same theme, however this time making sure to incorporate more overlapping pieces. Once these ideas were ready I emailed the clients to show them my initial thoughts about the piece and to give them an idea of the cost of the finished piece.


When they got back in touch they had decided that they could stretch to a slightly larger piece, so had decided on 35cm x 25cm for the piece. We had already discussed the mounting of the piece as they wanted the same method as used on their last panel. This was a board with a simple hanging system measuring 5cm larger on each side than their piece of glass, to give a good sized border to the piece. The glass would then be mounted away from the board to allow the light to pass through the piece.
They had also decided that they wanted their piece to be a little different to their previous panel and so had been having a look at a few of my other pieces of work for inspiration. They thought that perhaps a piece based loosely on my Linea fused glass bowl or my Shatter panels would be along the right lines, but again using mostly yellows and oranges. As those designs featured blue, I suggested having blue as a way to offset the vibrancy of the yellow and oranges in this design and they liked that idea. I then went back to the drawing board and came up with four ideas based around the new brief of pieces similar to the two which they liked, but using the chosen colours.
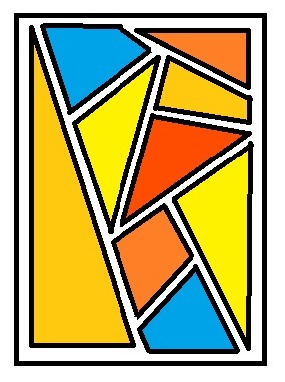


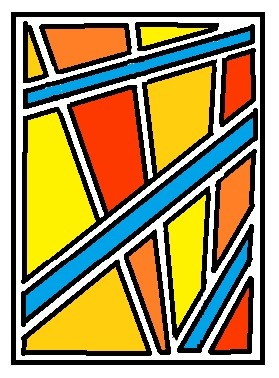
As with their previous panel, they loved the designs and found it hard to choose, but went with my second design and did not have any suggestions for alterations or inclusions and so the making process could now begin!

Now that we had confirmed the finished size of the piece and mount, I could cut the board which would be the backing mount for the panel. I tend to use MDF to mount onto as it is strong, relatively light and has a smooth finish ideal for painting and sanding. You can also buy waterproof versions, which I feel would be necessary for any piece going into a bathroom with a shower or bath in. Once the board and batons which I use for hanging were cut, it is basically a process of painting and sanding the boards until I am happy with the finish. This usually involves three to four coats of paint, with a sanding after the first coat, unless I am not satisfied with the finish after that amount of work.

For any design this complex where I will have to cut lots of pieces of glass to fit each other, the first step is to draw out the design full size so that I have the lines to work to when I am cutting the sections of glass. Personally I find this the easiest way to make sure that all the pieces are cut accurately, which is required for any design, but is absolutely essential in one like this or the pieces would not fit together and the design running through the panel would be skewed.
Now for one of my favourite parts – time to cut the glass :) . As this design involves sections of solid coloured glass, the best way to achieve this is to cut pieces from sheets of glass in those colours. The main difference in this piece before it was fired is that the orange and yellow sections do not reach their full colour until they have been fired near enough to their full fuse temperature, so these pieces look much paler beforehand. It is probably hard to tell from my full scale sketch, but I cut the whole design a little smaller than the size of the finished piece. Once I had cleaned and set up these pieces of glass in the kiln, I then cut a piece of clear glass to the full size of the panel and set this on top of those pieces in the kiln. When the glass melts in the kiln the clear glass then bends around the coloured pieces below and will give completely smooth and seamless edges to the finished panel. If this is not done then the panel would essentially have very slight dips in the glass where the different sections met. This probably would not be an issue for many people but I am certainly a perfectionist and am not happy with pieces if they are not just right!


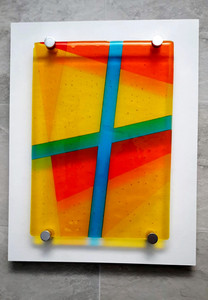
Once the glass had finished fusing in the kiln and had cooled, I was then able to clean it and move onto mounting it up. Many designs require two or three firings in the kiln, but as we had discussed having a smooth finish on the panel, this piece needed just one firing. The mounting of the piece requires a little thought about placement of the mounting batons and chrome fittings which I use to hold the glass, but is then a reasonably simple (if often frustrating) task of drilling holes and screwing the board, batons and mounts together. The mounts that I used for this piece are two separate pieces of metal which screw together. This means that you screw the backs of the mounts to the board and attach the front of the mounts to the glass and then push together and tighten up the screws. This requires very careful positioning to make sure that everything lines up at the end.

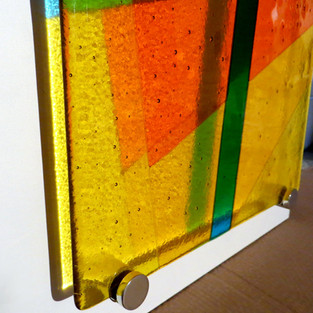


The panel was now complete and ready to be collected by the clients. I can always post pieces out or deliver if necessary, but as the clients were local, they said that they would pop in when they were in the area. The quote below is from Karen, who commissioned the piece. She was also kind enough to send me some images of the glass in its new home.
“ Our shower room has lots of natural light from a velux window and glass seemed to be the perfect medium for a picture for a steamy room. I specified colours and left the design to Roxy. The result is fabulous with the additional bonus of beautiful reflections on the board behind the picture“


I have to admit that I thoroughly enjoy producing work to commission, as seeing clients that are thrilled with their new piece of glass and knowing that it is something which will continue to bring them joy for years to come is very rewarding for me. It is also often a great chance to produce pieces of work and designs which I would otherwise never consider or try out – some of which do require testing first, but that just makes the finished product more satisfying in the end. If you are thinking about commissioning a piece of glass from myself or another product from another artist, I would definitely say give it a go – you will have a piece completely unique to you, that I am sure you will treasure for years.


Comments